10 things you need to know about raised beds
- By professionalgardening
professional gardening2016@gmail.com
+44 7492 657585
Priory Gardens, UK

Raised beds are one of the best decisions you can make for your garden. Not only do you level up the landscape design but also get to enjoy numerous benefits for super-efficient plant development.
Garden raised beds are the epitome of good drainage and a seamless soil care process. Growing flowers, fruits, and veggies in elevated boxes keep weeds away from your greens and protects them from infestations.
So if questions such as how to make raised beds and when to do it spark for you, we suggest you check our expert gardeners’ advice. Make sure to read all about raised beds here!
Before we get into details on how to build a raised flower bed, let’s go over the basics in box gardening.
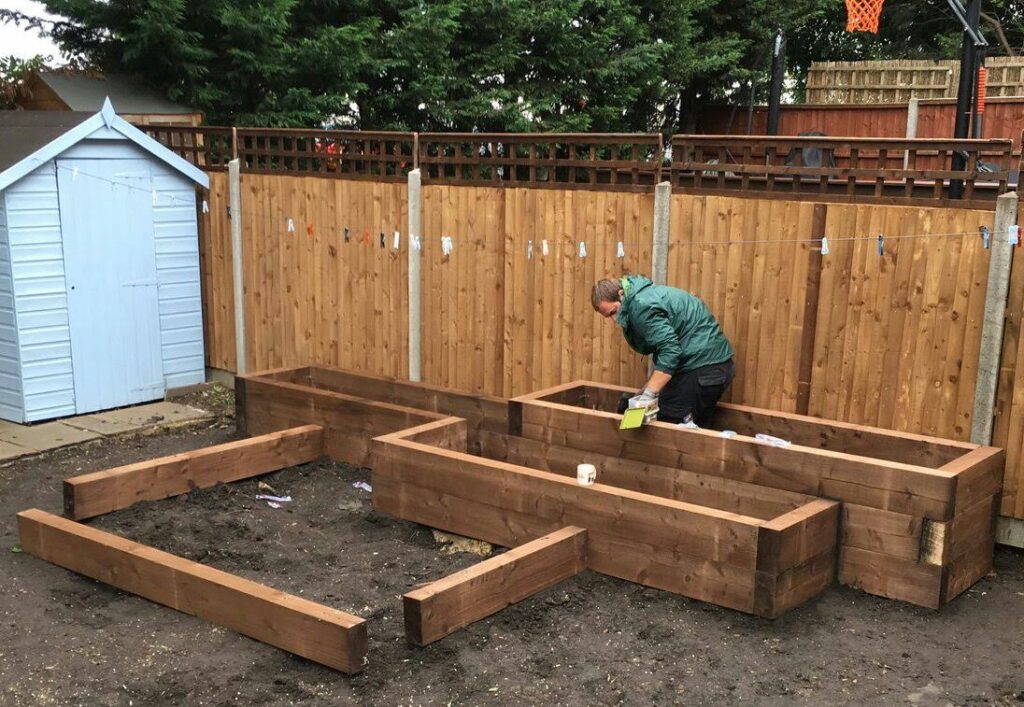
A raised bed is an elevated box container used for fundamental gardening purposes and plant cultivation. The big soil-filled structure allows greens to grow healthy, relatively undisturbed by external factors and aggressors (e.g. weeds, pests). The main difference between a planter and a raised bed is that raised beds have no bottom, so the soil is in direct contact with the bare ground.
Growing plants in raised beds are beneficial for your garden, saves you time, and spares you future troubles. Here are some of the main advantages of starting your garden greens in a raised bed box:
There are way too many types of garden raised beds. From simple crafty DIY containers to fully assembled wooden, plastic, and metal-plated raised beds. So how can you decide which flower bed is the best fit for your backyard? We are here to guide you through the process.
With a wild variety of raised beds on the market, there are a few garden factors to consider when picking a garden box for your outdoor space.
Building a mini raised garden starts with the fundamental choice of bed material.
Lumber and cedar are the most commonly used wood materials for raised bed construction. Pressure-treated lumber is considered perfectly suitable for plant cultivation since it is harder to rot as a result of humid weather and soil moisture. Cedar is also an environmentally friendly alternative that is both naturally durable and rot-resistant.
Always go for thicker wooden boards, as they last longer. If these two types of wood are not within your budget, feel free to invest in a more affordable wood option. However, be aware cheaper wood has a shorter lifespan thus you might need to replace the raised bed blocks every other year.
Concrete blocks and bricks are also a reliable alternatives for building solid and durable raised beds. Super easy to maintain and match the landscape design, these types of garden beds can be any color and shape. The elevated structures built from concrete and bricklaying are stable and will last for many years without any sign of breakage or damage.
Stone is also a wonderful exterior solution for solid raised flower beds. The stone laying pattern can be customized to match the architecture and landscape of your property. For a quicker and easier building process, go for flat stones, not round ones. For high endurance, seal with concrete in between the layers.
The efficiency of raised beds is profoundly dependent on the height of the box. The minimum elevation to strive for is about 15 cm. At that height, plants can thrive on loose and warmer soil with good drainage and decent nutritional properties.
A higher rise further protects the greens from weed contamination and unwelcome pests. As a result, plants need less watering, grow deeper roots, and can develop to their full potential.
The common size of a raised bed is about 120 cm in width. After all, you need to be able to easily access the whole elevated gardening area, including the central part. A bed too wide is bad news. Imagine the discomfort of having to step on the raised structure just to get to the middle planted greenery for maintenance, weeding, or harvest.
Length is not a vital metric when it comes to raised flower beds. So you can go wild with this one – make it as long as you wish. If you have already considered smooth garden access within width measurements, there is nothing to be cautious about.
One of the best things about raised beds is they allow you to grow plants everywhere. Although, if you need to install the beds over grass, concrete, nutrient-deficient, or compacted soil, make sure you build a higher bed (at least 30cm) and know how much soil you would need to fill the box up.
Soil preparation is key, even when you plan on installing a raised bed in your garden. Why? Because a compacted ground is a pure horticultural nightmare – hard to work with and unwelcoming to plants and their roots. So our recommendation is to always break the chunks and loosen the soil up before you start laying the raised foundation.
Once you are ready with terrain preparation, it is time to pay attention to the filler. You may use yard topsoil for filler (if it is healthy and rich in nutrients) or use an entirely new soil blend. We suggest you go after the latter option because you can start working on the soil mixture from scratch and bring out its best properties for ultimate plant growth.
Soil blend is the most crucial component to make a raised bed work. Amendments such as adding topsoil, compost, or/and organic fertilizers make a nutrient-friendly soil mix ideal for planting and growing greens. To top up soil quality, protect the crops, and retain moisture, add a mulch or hay layer.
A soil mixture of 1:1 loam topsoil and compost is a great blend that will work wonders for your raised bed plants. The best part is, you can mix it at home and save money. However, if you are looking for premium quality, then here is another blend to try – equal parts vermiculite, peat moss, and a homemade compost mix.
The first thing you need to do is find the best location for the raised beds in your garden. Meaning a flat surface ground with complimentary growing conditions. The perfect site has good drainage and steady airflow. Decent access to sunlight is also vital.
For productive results and healthy plant development, install the raised bed on the sunniest spot in your outdoor area. Receiving 6 to 8 hours of light a day is sufficient enough to stimulate germination and plant cultivation, and help you grow a wide array of flowers, herbs, and a variety of edible crops.
The worst areas to place an elevated garden bed are shade-friendly corners and soggy soil spots. Make sure to avoid those sites with unpleasant growing conditions such as high humidity, shade exposure, and limited access to water.
Now, once you have allocated the perfect raised bed spot and already prepared the ground soil, it is time to gather the tools and start constructing the bed box.
When it comes to fastenings, go for coated deck screws. The common structure of a raised bed requires six for each corner and two for the mid-span support posts. Cross supports help you retain the shape of the container and keeps it in one place, so you do not have to worry about your garden installation collapsing. Aluminum flat braces are most suitable for this kind of outdoor project.
For the nifty task at hand and to assure a seamless construction process, you also need the following building tools:
Of course, even if you have gathered all those tools, you still need the base materials to build the raised bed from scratch. Whether you choose to go for wooden blocks or decide to lay bricks, stones, or concrete, a raised structure plan in your garden will be quite simple to execute.
The next step in the raised bed garden project is to choose what to plant. For ultimate yield and healthy growing crops, it is your job to select greens with a preference for your local weather and soil blend. Check labels and tags before you buy seeds or consult a gardening specialist.
Knowing a plant’s growth habits is an essential part of the selection process because the raised bed greens mus co-exist without causing any obstructions. For example, climbing and crawling plants might interfere with the development of their plant neighbours. The last thing you need is the crops to suffer and affect each other’s growth. Therefore, pay attention to other factors such as root size and spacing requirements, as well.
Fill the raised garden space with fruits and veggies, or make a great flower display. Both edibles and ornamentals tend to thrive in this type of nutrient-rich environment, so it is all up to you to set up the garden of your dreams!
When is the best time to start your raised bed garden? Well, that depends on what type of plants you are planning on growing and what are the climate conditions in your region. Every flower and veggie is different and has its own seasonal and weather preferences. Read the labels on seed packets or speak with your professional gardener to determine the best period to begin planting.
Once everything else is prepared and you have the wall structure prepared, planting is not that hard. Step one is to fill the container with the nutrient-rich soil blend. Due to the compost ingredient in the mix, the soil might look a little lumpy so go ahead and break the clumps with a spading fork.
When you get that fine soil texture, it is safe to continue to the sowing part. Planting in a raised flower bed is no different than planting in your regular garden, so we bet you can handle the process yourself. If you are cautious, get in touch with our team of professional gardeners in London and we can take it off your plate.
Watering is the most important garden care process. No plant will ever grow healthy in your raised bed if it does not get enough water right from the start. During germination and in the early stages of development, raised garden plants need more water than usual, so adopt a daily watering schedule for the first few weeks.
At a later stage, the amount of water raised bed crops needs differs according to the season and local climate. In summer, water the greens every morning and/or evening, depending on their preferences and the air temperature. During the winter, autumn, and spring seasons it is OK to water a few times a week.
In general, raised bed plants consume water and nutrients faster, so the soil dries out faster as well. Due to the increased evaporation and better soil drainage, it is vital to monitor moisture levels daily, especially in hot and dry weather.
Weed and take care of your raised bed garden just like you would if it was a ground-level one. Here are our top tips and tricks on weeding and maintenance:
A layer of organic mulch limits the spread of unwelcomed plants, conserves soil moisture, and protects the roots from pest damage. All things that will make your garden care job easier than ever.

Meet Nikolay, a talented blog and content writer with years of experience creating engaging and informative content for a variety of industries.


TO CELEBRATE OUR NEW WEBSITE WE WANT TO GIVE YOU
